

Introduction
In the dynamic landscape of software development, the need for streamlined and efficient processes in the pipeline is more crucial. Jenkins is an open-source automation server, that has emerged as a cornerstone in the world of continuous integration and continuous delivery (CI/CD). In this blog post, we'll start on a journey to unravel the power of Jenkins, exploring its installation, configuration, and its role in transforming development workflows.
What is Jenkins?
Jenkins is a self-contained, open-source automation server that can be used to automate all sorts of tasks related to building, testing, and delivering or deploying software.
Jenkins can be installed through native system packages, Docker, or even run standalone by any machine with a Java Runtime Environment (JRE) installed.
Why Jenkins?
Jenkins stands out as the go-to automation server for several reasons. Its open-source nature ensures freedom and flexibility, allowing you to adapt it to your specific needs. With a vast and active community, Jenkins continually evolves with the industry's best practices. The ease of use and extensive plugin ecosystem make it a preferred choice for developers seeking a versatile and scalable CI/CD solution.

Jenkins is free and you don’t have to pay for anything. Jenkins can be hosted on a Virtual Machine, a container. Or even locally for development purposes.
Continuous Integration
Continuous Integration is a process in which the code is merged from multiple contributors and added to a single repository. In simple words, CI is a process to take the code package it, and send it to the CD for further processing.
Continuous Deployment
Continuous Deployment is an automated process in which the code is taken from the repository and deployed to the system.
CI/CD
CI/CD in simple words is a process to take a code, package it up and deploy it to a system that can be serverless, a VM, or a container.
CI/CD can be broken down into 3 steps:
• CI – Continuous Integration
• CD – Continuous Delivery
• CD – Continuous Deployment

Key Processes of Continuous Integration
• Package up the code
• Test the code (run unit tests, integration tests, etc)
• Run security checks against the code

Key Pieces of CD:
• Ensure you're authenticated to the system or wherever you're deploying.
• Ensure that the code that's being deployed is working as expected once it's deployed.
Continuous Deployment vs Continuous Delivery
The basic difference between Continuous Delivery and Continuous Deployment is that in Continuous Delivery to deploy the code after the CI process you have to manually trigger it via some button to deploy on the system. Where as in Continuous Deployment this process is automatic.
Installing Jenkins
Install Jenkins from the official docker image. Open the terminal on your Mac and run the following command. Make sure that docker is installed on your system. This is for Mac for Windows and Ubuntu you may follow the documentation or else you can install docker and pull the image from the docker hub and run it on your machine.
docker run -p 8080:8080 -p 50000:50000 -d -v jenkins_home:/var/jenkins_home jenkins/jenkins:lts

After running the command an authorization token will be generated by the terminal then copy that code and open the localhost port 8080 then you will find Jenkins will be running there. Now it will ask for an authorization token you have to paste the code that you have copied from the terminal. Then it will ask for a username and password to set up your account. Then you will find this kind of interface

then use your username and password to log in to your account. After successful login, you will find this kind of interface
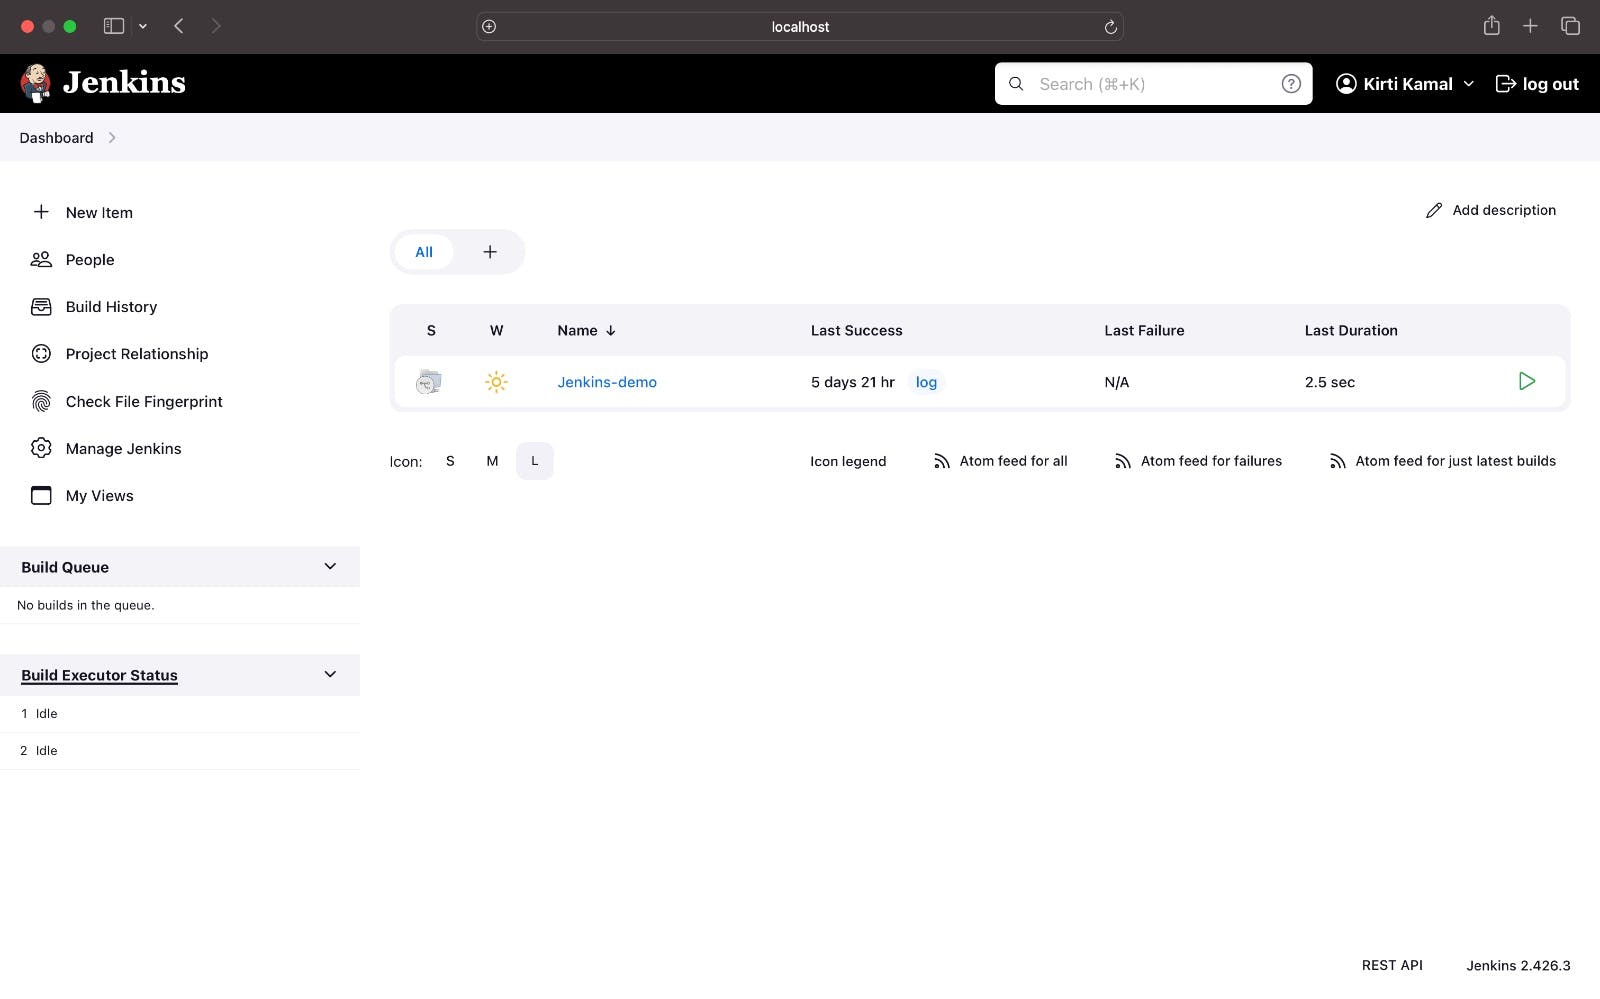
congratulations you have successfully installed Jenkins and set up your account.
Jenkins Plugins
Plugins are used in Jenkins to enhance Jenkins functionality and cater to user-specific needs. Just like how Gmail, Facebook, and LinkedIn help you connect your one service to another, plugins also work the same way and allow us to connect one service to other services and work with other products.
For example, if you want to connect to Azure from Jenkins you would need to download Azure Plugin which will allow you to connect to Azure at a programmatic level. Similarly, we can have other integrations with AWS, GitHub, etc using plugins.

Install Plugins
To install a new plugin in Jenkins
Go to Manage Jenkins -> Manager Plugins
Click Available and search for the desired plugin.
Select the desired plugin and Install.
Note: Few plugins may need a restart

Jenkinsfile
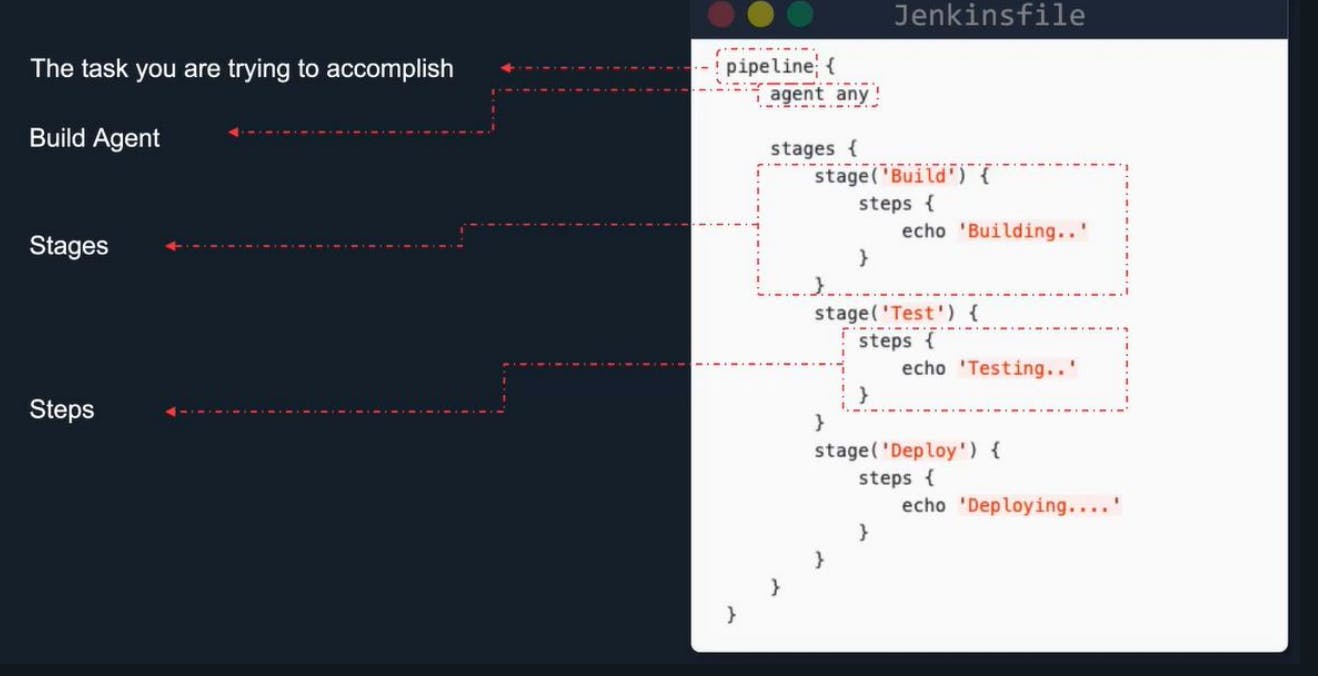
Jenkinsfile is a text file that contains definitions. This could be templates or instructions. It tells pipelines what they should be doing and what services and plugins they should be interacting with.
Components of Jenkinsfile:
Pipeline – The task you are trying to accomplish
Build Agent –The place where you run your pipeline
Stages – Staging/Production/UAT
Steps –Work done in the pipeline
Conclusion
As we wrap up this comprehensive guide to Jenkins, you'll have gained a solid understanding of its capabilities and how it can revolutionize your development processes. Let's build something interesting and automate it using Jenkins.