

Introduction
In the fast-paced world of software development, efficient and reliable deployment processes are crucial for delivering high-quality applications. Traditional deployment methods often fall short of meeting the demands of modern development workflows. To overcome this traditional deployment method Argo CD comes into the picture.
Argo CD is a powerful and open-source tool designed to simplify and streamline continuous delivery in Kubernetes environments. In this blog post, we'll explore the key features of Argo CD and how it revolutionizes the deployment process.
What is Argo CD?
Argo CD is an open-source declarative continuous delivery (CD) tool specifically designed for Kubernetes. It follows the GitOps principles, utilizing Git repositories as the source of truth for defining, managing, and versioning the desired state of applications running on Kubernetes clusters.
What is GitOps?
GitOps is a way of implementing Continuous Deployment for cloud-native applications. It focuses on a developer-centric experience when operating infrastructure, by using tools developers are already familiar with, including Git and Continuous Deployment tools.
The core idea of GitOps is to have a Git repository that always contains declarative descriptions of the infrastructure currently desired in the production environment and an automated process to make the production environment match the described state in the repository.
If you want to deploy a new application or update an existing one, you only need to update the repository - the automated process handles everything else. It’s like having cruise control for managing your applications in production.
Installing Argo CD
Before you install argo cd you need to install kubectl. To know more about Kubernetes and its installation check out this blog on K8s.
Once you have your command line environment setup with access to your Kubernetes cluster, you will want to use kubectl to create a namespace. The following command demonstrates creating a namespace named, argocd, but you may name it as you like:
kubectl create namespace argocd
After you have your namespace created, you will want to run the following command. If you used an alternate namespace name, you will want to update the following command with that name. The following example demonstrates how to install argocd into the argocd namespace:
kubectl apply -n argocd -f https://raw.githubusercontent.com/argoproj/argo-cd/stable/manifests/install.yaml
The above command will create several custom resource definitions, service accounts, network policies, config maps, and other Kubernetes objects in the specified namespace.
If you'd like to check the resources created, you can run the following command. Again, be sure to use the namespace name you created:
kubectl get all -n argocd
The Argo CD API server service is not exposed by default; this means it is configured with a Cluster IP and not a Load Balancer. To access the API server you will have to do one of the following:
1. Configure a Load Balancer
To configure LoadBalancer simply patch the argocd-server service and change the service type to LoadBalancer. If you'd wish to follow this route, run the following command:
kubectl patch svc argocd-server -n argocd -p '{"spec": {"type": "LoadBalancer"}}'
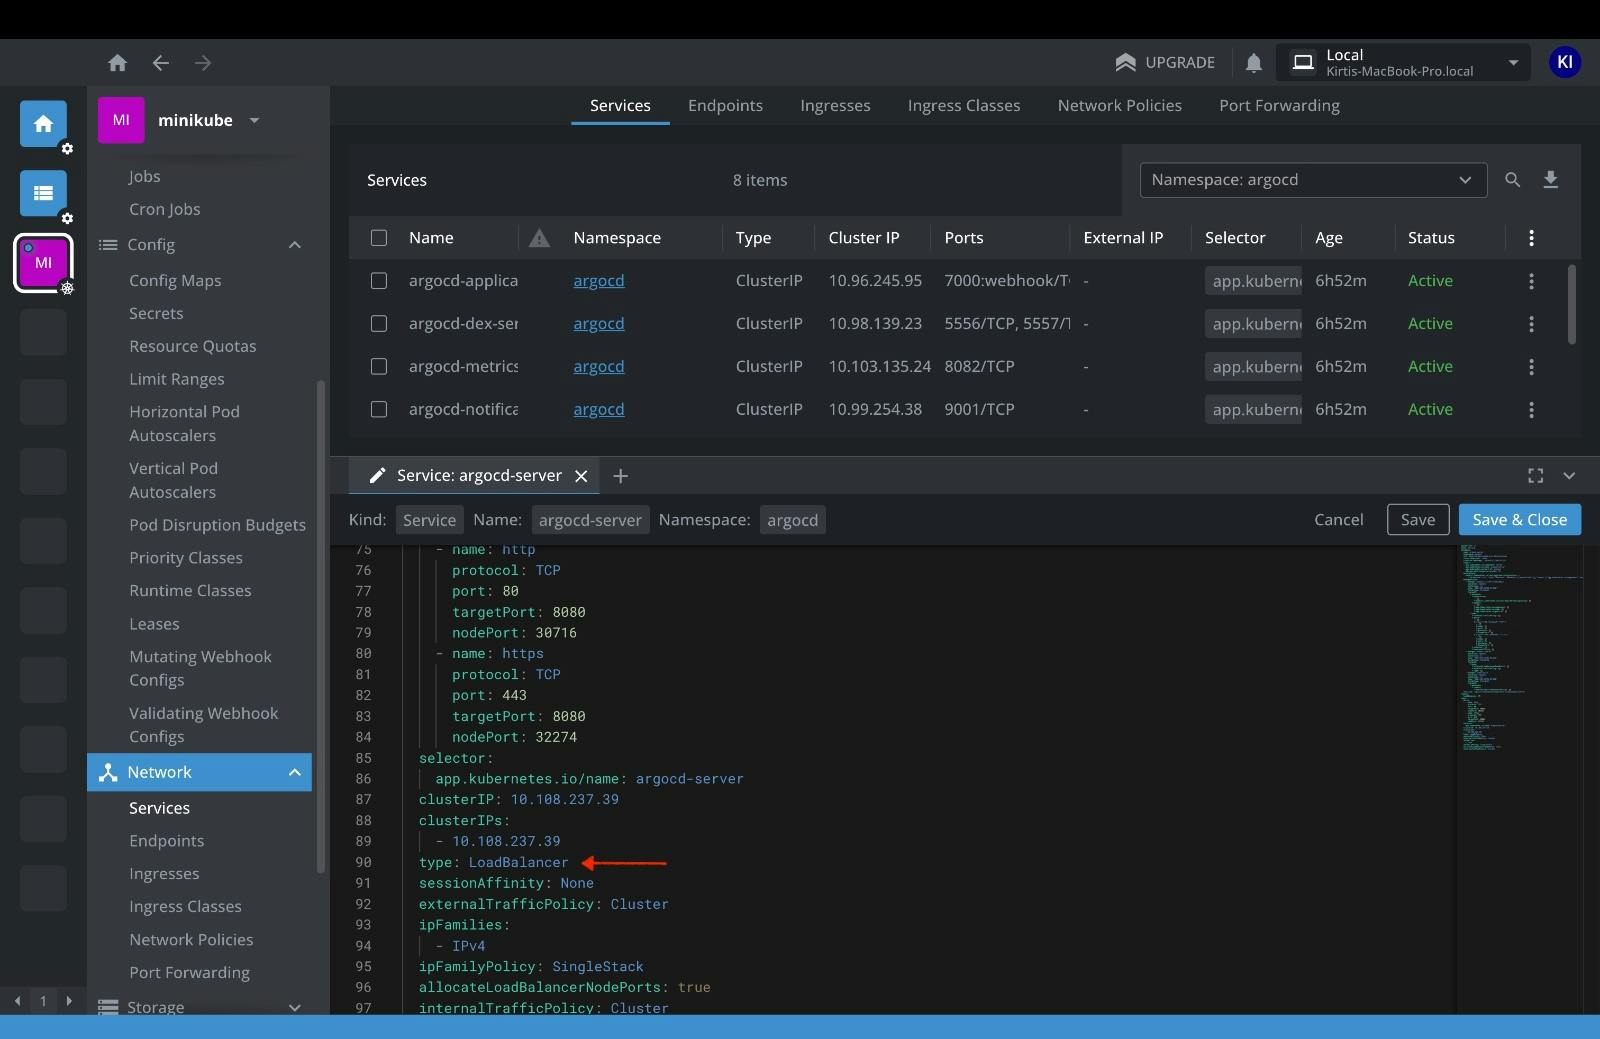
Or else you can simply change the service type to LoadBalancer using the Lens dashboard.
2. Use Port Forwarding
Finally, you can use port forwarding to simply connect to the argocd-server service in your Kubernetes cluster.
The following command demonstrates how you would use the kubectl to port forward to said service in the argocd namespace using a local port of 8080 and a container port of 443.
kubectl port-forward svc/argocd-server -n argocd 8080:443
Using Lens also you may do the same thing and it will forward to a random port.
Now open http://localhost:8080 in your system then you will find argo will be running there.
Logging into Argo
To log in to Argo the default username is admin and the password is auto-generated and stored as clear text. You can retrieve this password using the following command:
kubectl -n argocd get secret argocd-initial-admin-secret -o jsonpath="{.data.password}" | base64 -d; echo
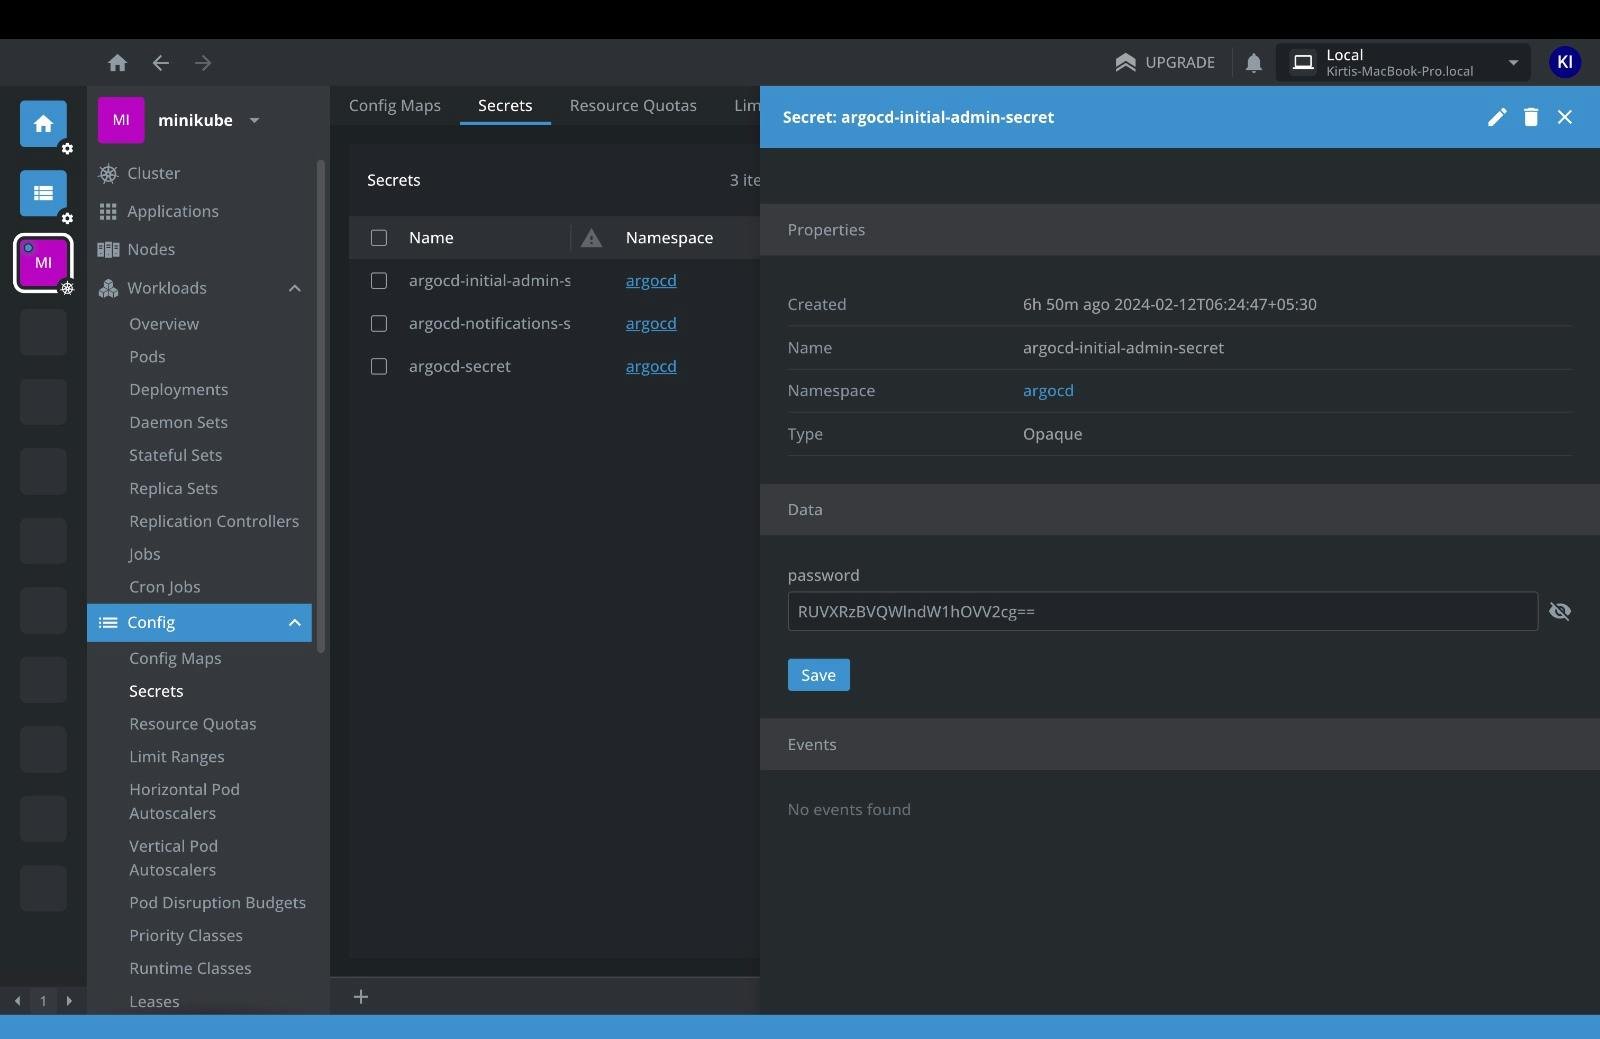
You can also find admin secrets using the lens dashboard as shown below
Deploying your first Argo Application
Once you have logged into Argo, you will want to create an application from a git repository. There is a repository called argocd-example-apps containing a guestbook application available on Argo's GitHub page. This is a simple app to demonstrate how Argo CD works.
You can create the app one of two ways - either via CLI or UI. If you wish to create the app via the command line using the argo binary, you would run the following command:
CLI
argocd app create guestbook --repo https://github.com/argoproj/argocd-example-apps.git --path guestbook --dest-server https://kubernetes.default.svc --dest-namespace default
Once you have configured the sample application within argo, you will need to sync the application. In the context of Argo, syncing will deploy the application within your Kubernetes cluster.
argocd app get guestbook

argocd app sync guestbook
You can do the same using the web too.
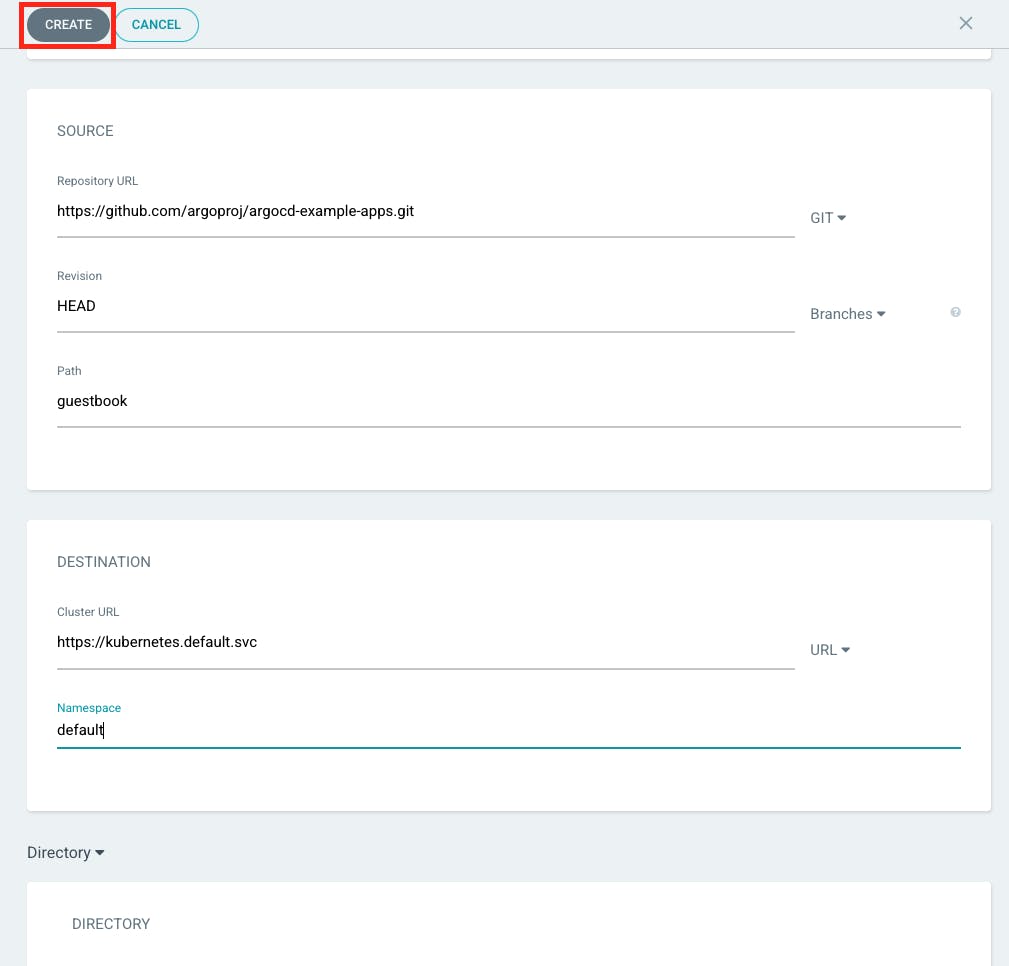
Next, you will connect the example repo (https://github.com/argoproj/argocd-example-apps.git) to Argo by setting the repository URL to the GitHub repo URL. You can leave the revision as HEAD, and set the path to simply, guestbook.
For Destination, you will select the https://kubernetes.default. option from the dropdown list and set the namespace to default.
Finally, you can click the create button at the very top of the screen to create your application in Argo.
Congratulations now you have created your first application in Argo.
Initially, you will notice your application sync status is OutOfSync and your health status is Missing. These status display this way because while you created the application within Argo, you have yet to actually tell Argo to deploy the Guestbook application, thus, no Kubernetes resources have been created. To do so click the sync button under your application page in your web browser.
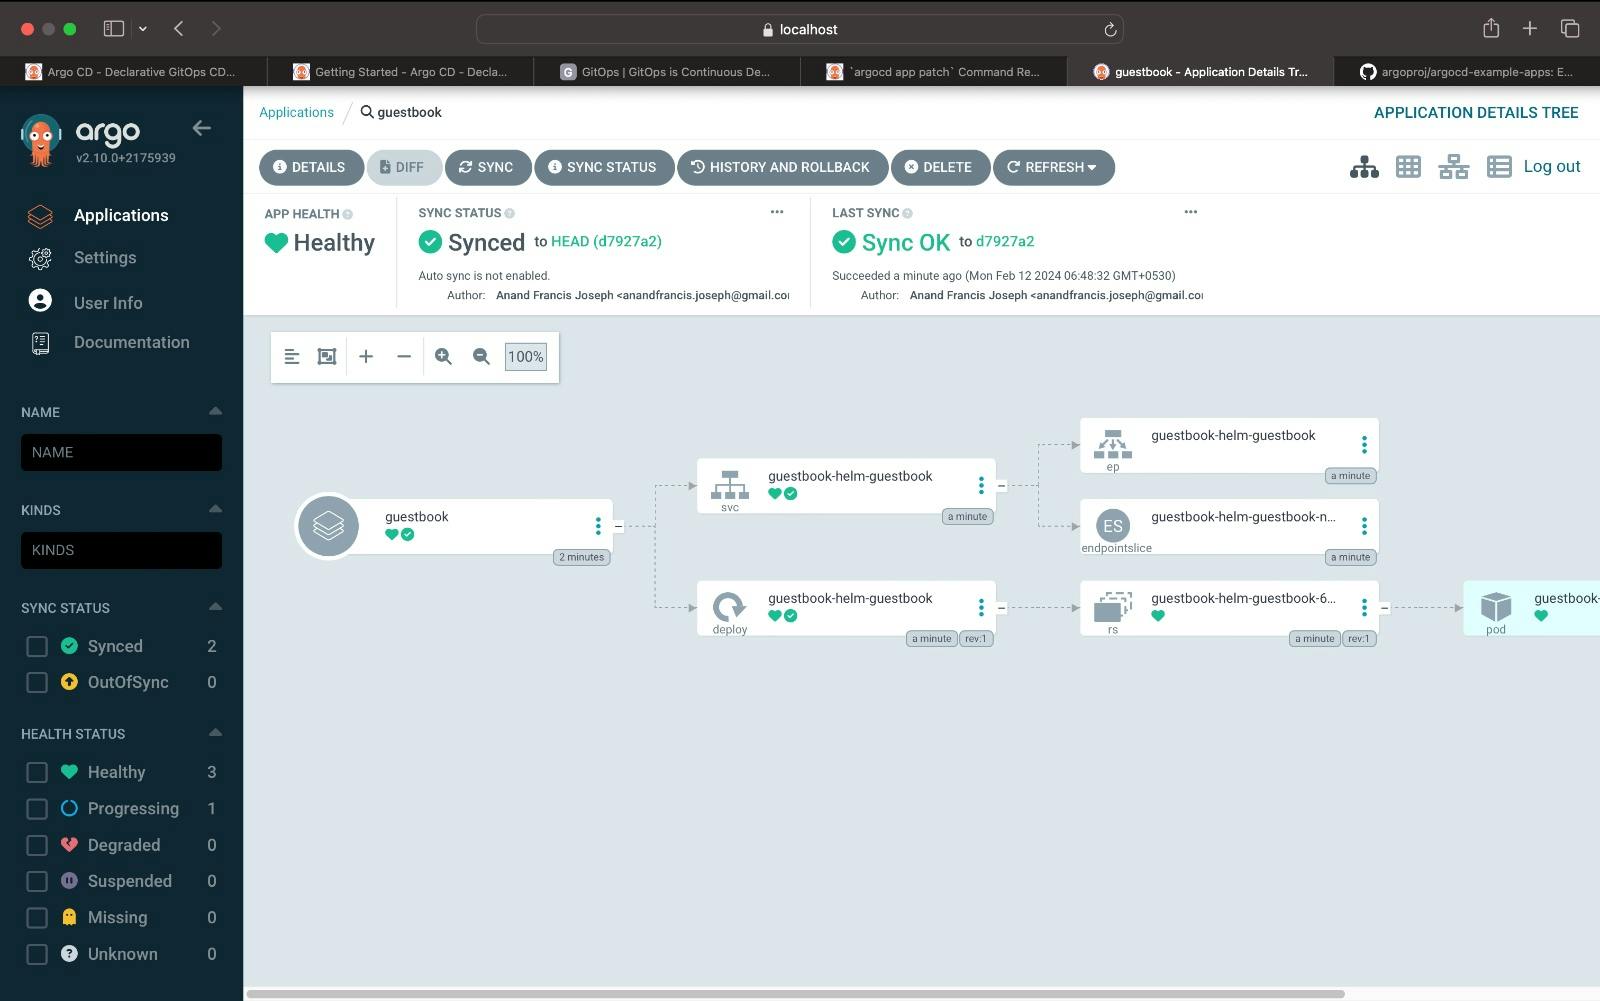
The sync command in Argo will retrieve the sample Kubernetes manifest from the Guestbook repository. Once the Kubernetes manifest is retrieved, Argo will run a kubectl apply command behind the scenes. The guestbook app should now be running in your cluster, and you should be able to view its resource components, logs, events, and even health status via the CLI or web browser.
Conclusion
In this blog, we have learned that Argo CD offers a paradigm shift in Kubernetes continuous delivery. Its GitOps foundation, automated synchronization, and seamless rollback capabilities streamline deployments. Multi-environment support ensures consistency, while customizable notifications keep teams informed. Argo CD is not just a tool; it's a catalyst for agile, reliable, and scalable deployment practices, redefining how we deliver software in Kubernetes environments.